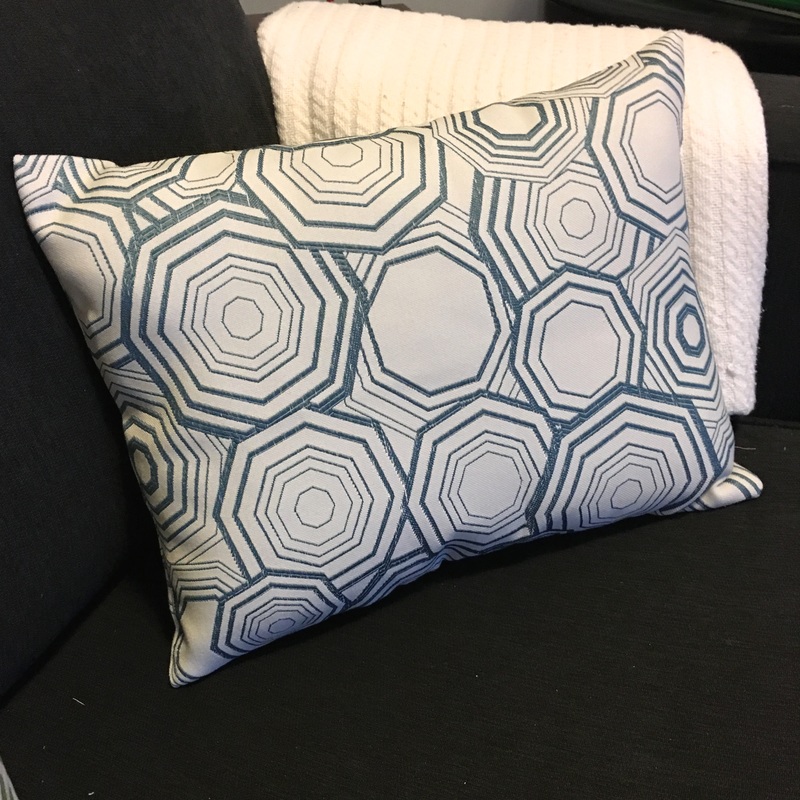
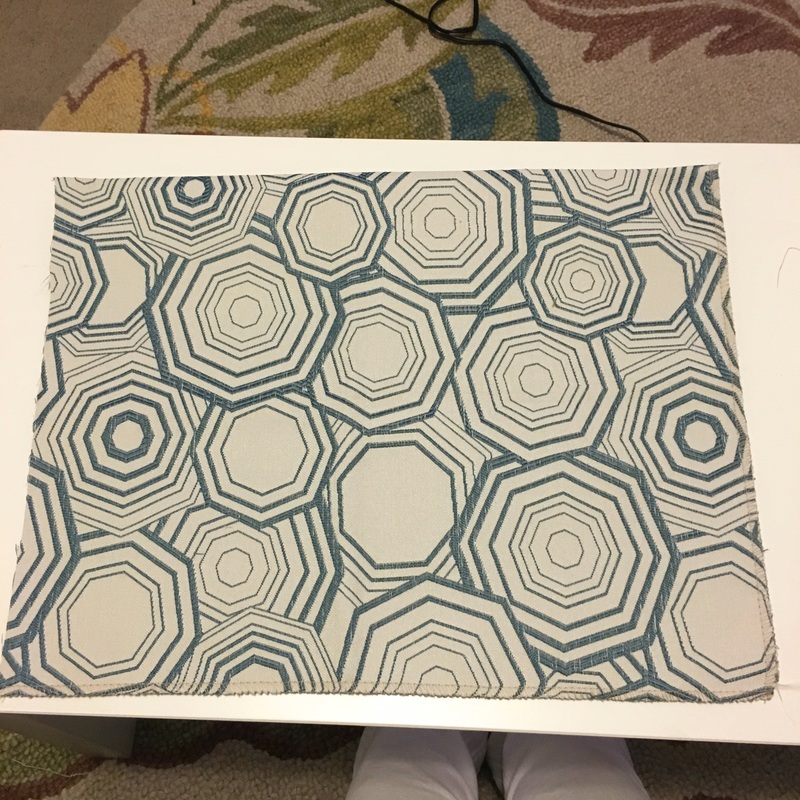
 I love the transformative power of pillows, they are an excellent way to add personality to a space without too much of a financial or time commitment. If a drop dead gorgeous fabric has ever caught your eye but the price tag was out of the budget you can get away with buying a small yardage amount and creating a double sided pillow or for an even tighter budget a single sided pillow. A bold print might be out of your comfort zone but as a throw pillow you can bring those fun prints into your decor in small doses as a pop on your couch or bed. I am going to show you step by step with photos how to sew a pillow cover with an invisible zipper closure. Having a zipper makes removing it for cleaning or swapping it out for a new one when you want a different decor look super convenient. I love to change out my daily pillows during the holidays! Sewing a zipper may seem scary but with a little patience and practice you will be sewing zippers like a pro in no time! I find my fabric at a local San Francisco shop but there are endless options online and for deals on pillow inserts head over to Wayfair. Read More What you will need: Fabric Pillow Form Zipper Thread to match fabric Pins Tape Measure Scissors Sewing Machine Invisible Zipper Foot Attachment Iron Once you decide on the size of your pillow you can purchase the fabric needed. I will be making a 12” x 16” pillow with a 12” invisible zipper and the same fabric on both sides of the pillow. I call this a double sided pillow where as a pillow with a different fabric on the front and back is a single sided pillow, say a bold print on one side and a solid neutral on the back. My pillow form is also 12” x 16” which makes for a full pillow. Pillow covers can be make out of any fabric but a medium weight fabric with a smooth texture is best for those just starting out. If the fabric is machine washable, wash, dry and iron it before beginning. This pre-shrinks the fabric which is essential to prevent shrinkage and seam puckering during future washings. Please read all instructions before beginning.
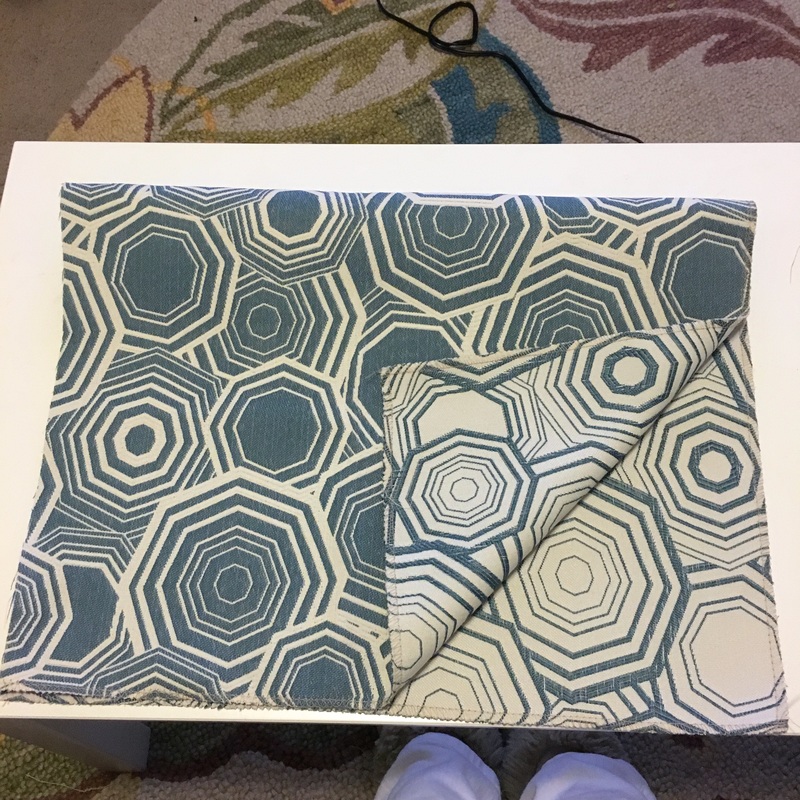
Step 1: Cut the fabric. I like my pillows nice and full so I cut my fabric 12.5” x 16.5”, if you are new to sewing feel free to increase those measurements to 13” x 17” to allow yourself a little extra wiggle room. Step 2: Place the fabric down on a flat surface with the “Right Sides” together, that means you want the sides of the fabric that you will look at once finished to be facing each other. In this case the fabric’s “Right Side” is white with blue geometric shapes and they should now be facing each other on the inside and the “Wrong Side” of the fabric (blue with white geometric shapes) are facing out. Pin along the top of the pillow to hold the two pieces of fabric together.
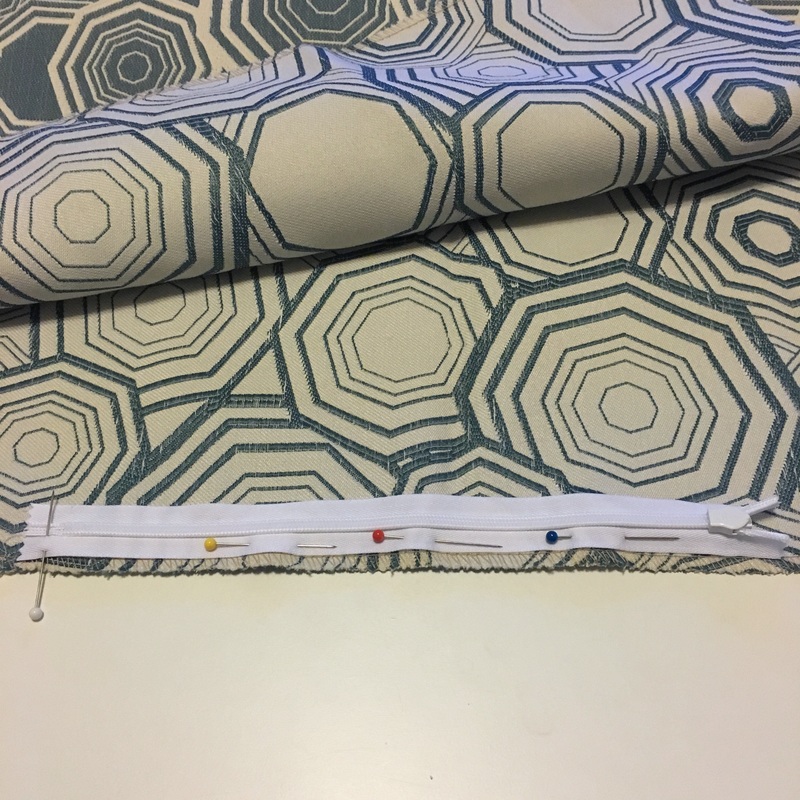
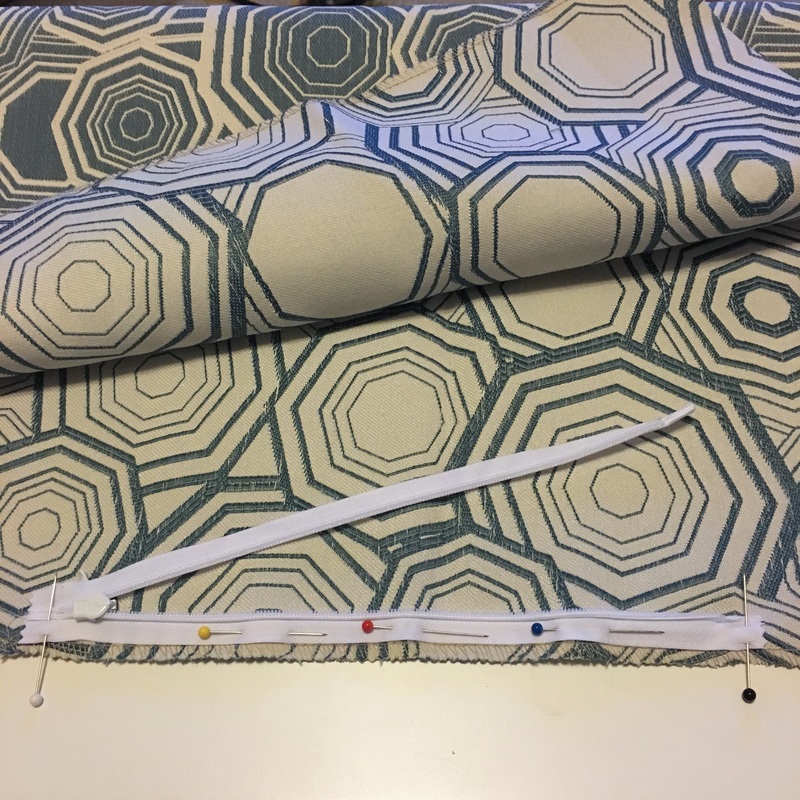
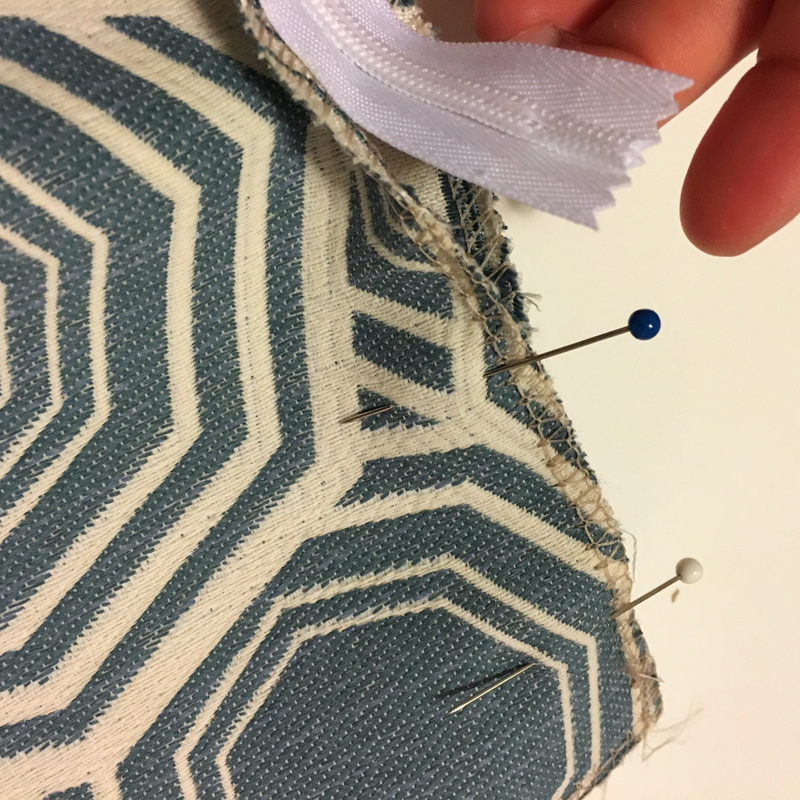
Step 3: Sew in the Zipper. Flip up the top piece of fabric on the bottom of the pillow and with the zipper closed center it on the bottom of your fabric, the 16” side that will be the bottom of the pillow. I have the zipper toggle on the right. Pin the zipper to the Right Side of the fabric by pinning the left end of the zipper to the fabric with a perpendicular pin and then with the pins going from left to right pin the zipper to the fabric along the edge. Step 4: Unzip the zipper being careful of the pins as you go and then pin the right side of the zipper to the fabric with a perpendicular pin.
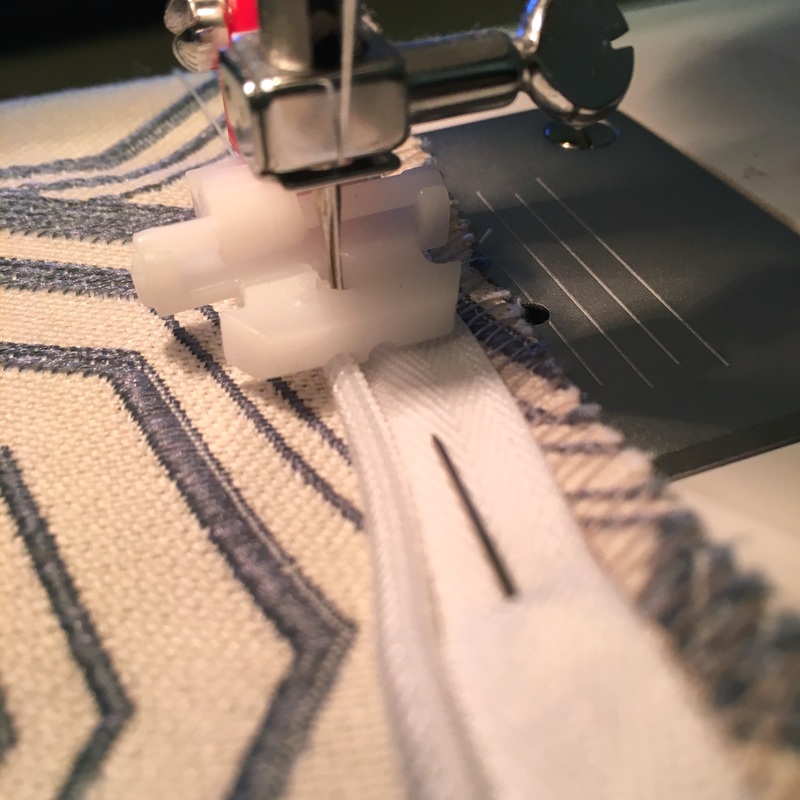
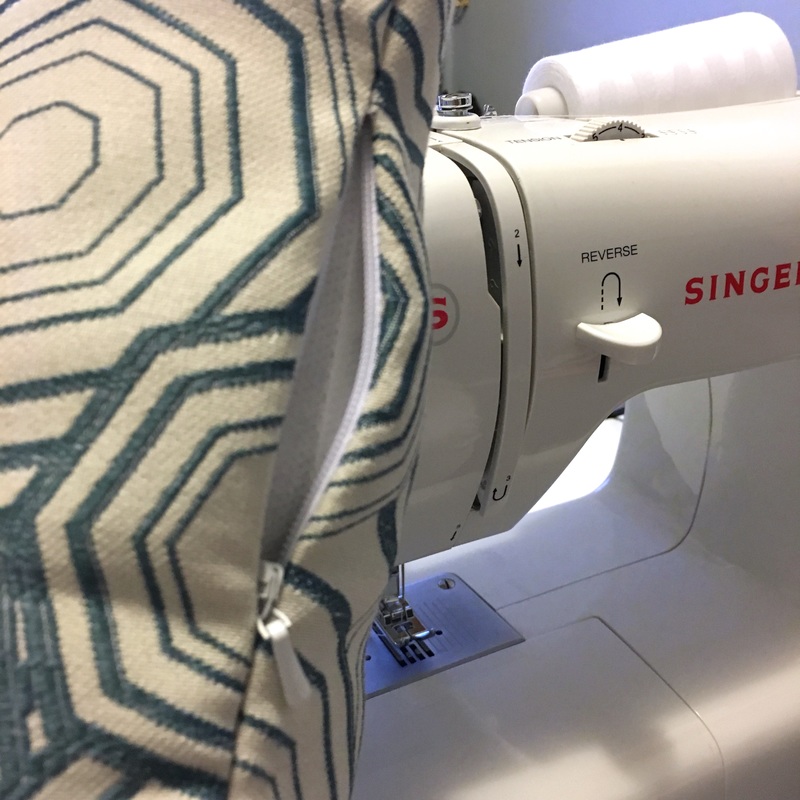
Step 5: Attach the "Invisible Zipper Foot" to your machine, this sewing machine attachment is very inexpensive if your machine did not come with one. Consult your machines manual for help if necessary, they usually snap on and off pretty easily. Step 6: Slide the zipper and fabric under the zipper foot on the end where the zipper is not connected. The zipper foot has grooves that the zipper will fit right into and will line up really close to the zipper teeth. As you sew towards the end where the zipper is connected and the zipper toggle is now, remove the pins as you go. Reinforce your seams at the beginning and end by back-stitching. Remove the fabric and close the zipper.
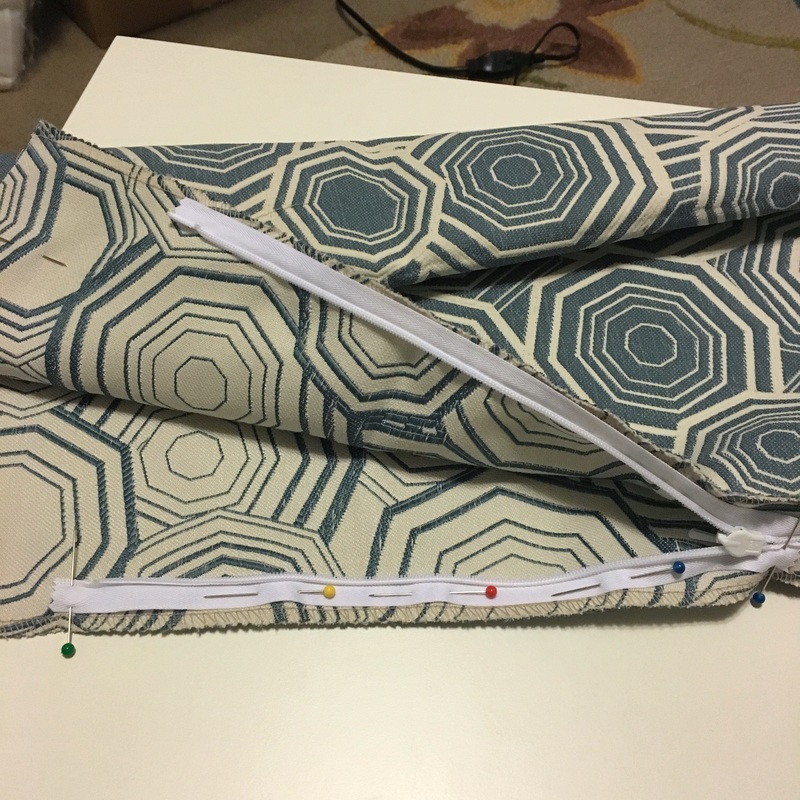
Step 7: Realign the fabric and pin the zipper to the bottom of the other Right Side of fabric. Again with the end pins being perpendicular to the zipper and the pins along the edge of the zipper are now going from right to left. *Unzip the zipper and sew removing the pins as you go. *The zipper foot slides left and right depending on which side of the zipper you are sewing so make sure to slide it to the other side in order for the zipper to fit into the zipper foots groove. Step 8: With the zipper closed pin the fabric together on both sides of the zipper and sew the front and back pieces of fabric together until you are just passed where you stopped sewing the zipper to the fabric. (Use a 5/8” seam allowance) You can use the Invisible Zipper Foot to do this just slide the plastic foot all the way to the left.
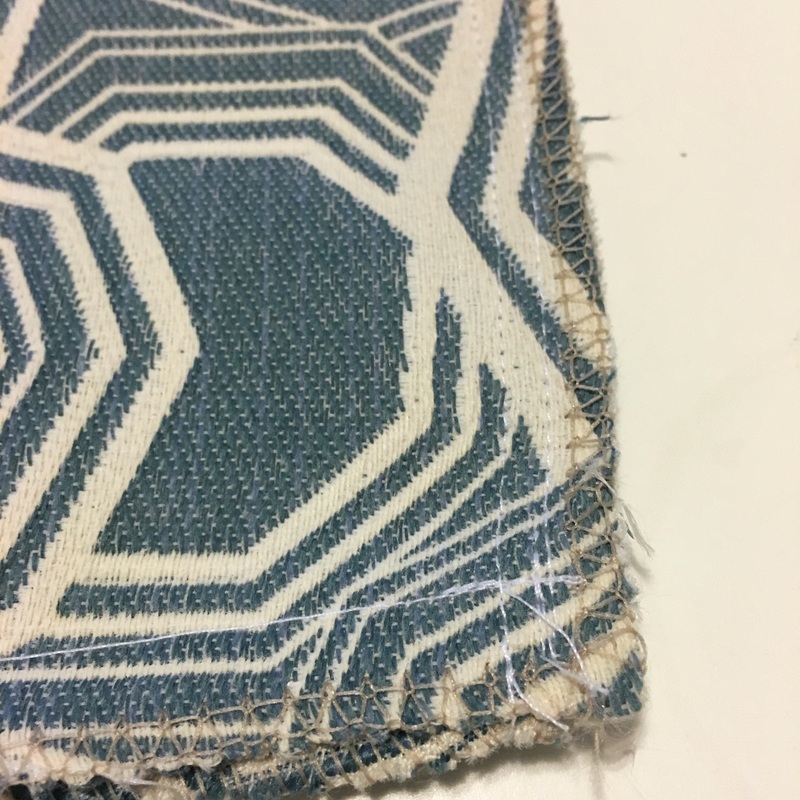
Step 9: Open the zipper (this is very important) if you do not you will not be able to turn the pillow case right side out. Sew all the way around the remaining 3 sides of fabric with a 5/8” seam allowance. Reinforce all starts and stops with a back-stitch. I have used a serger on my edges to prevent unraveling but you can use a zig-zag stitch or pinking shears. Step 10: Turn the pillow cover right side out, press with an iron, stuff with your pillow form and enjoy your new creation! I hope this tutorial was helpful! 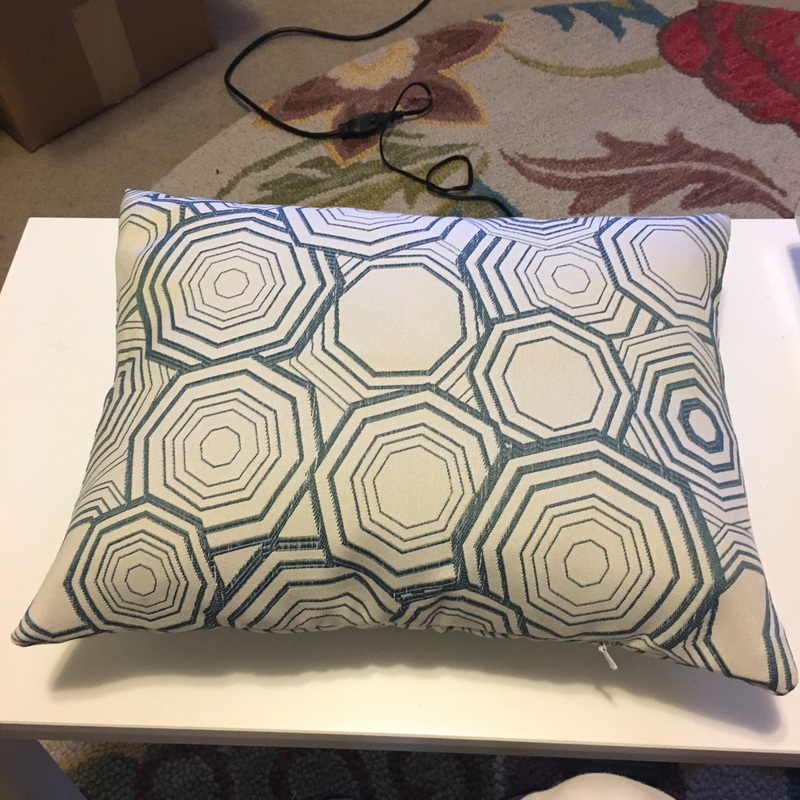
0 Comments
Leave a Reply. |
~ ABOUT ME ~
Creative Owner of Delightful Designs, a boutique where furniture is given a new colorfully chic life! Read more...
CATEGORIES
All
ARCHIVES
November 2017
|

 RSS Feed