|
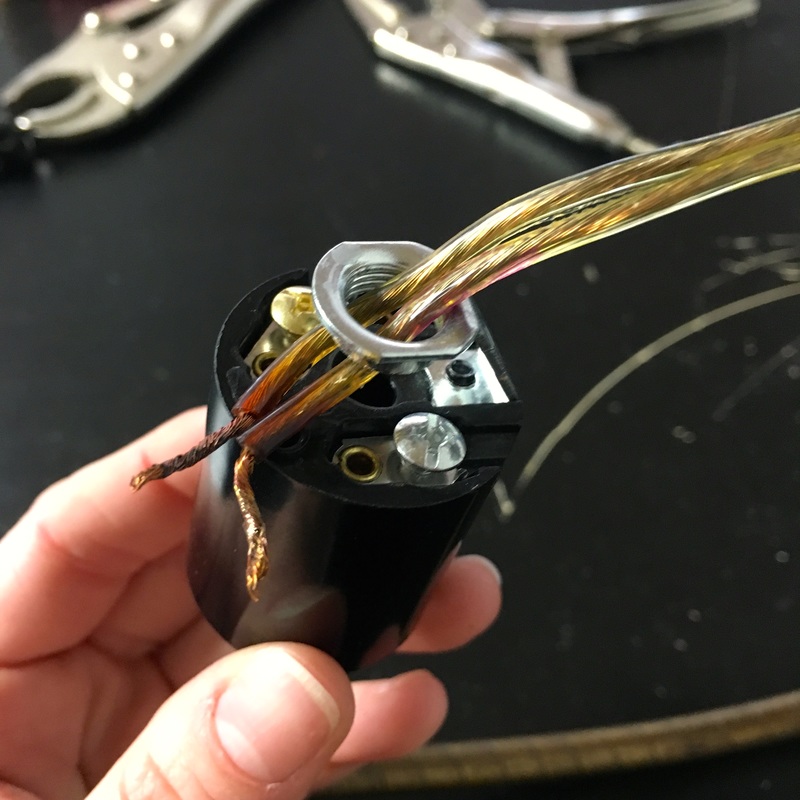
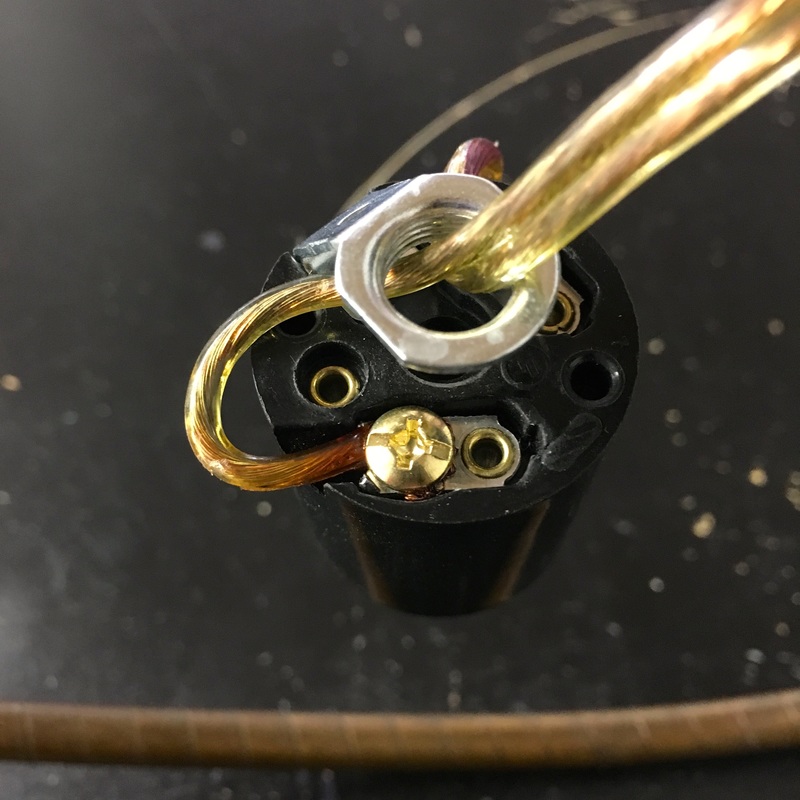
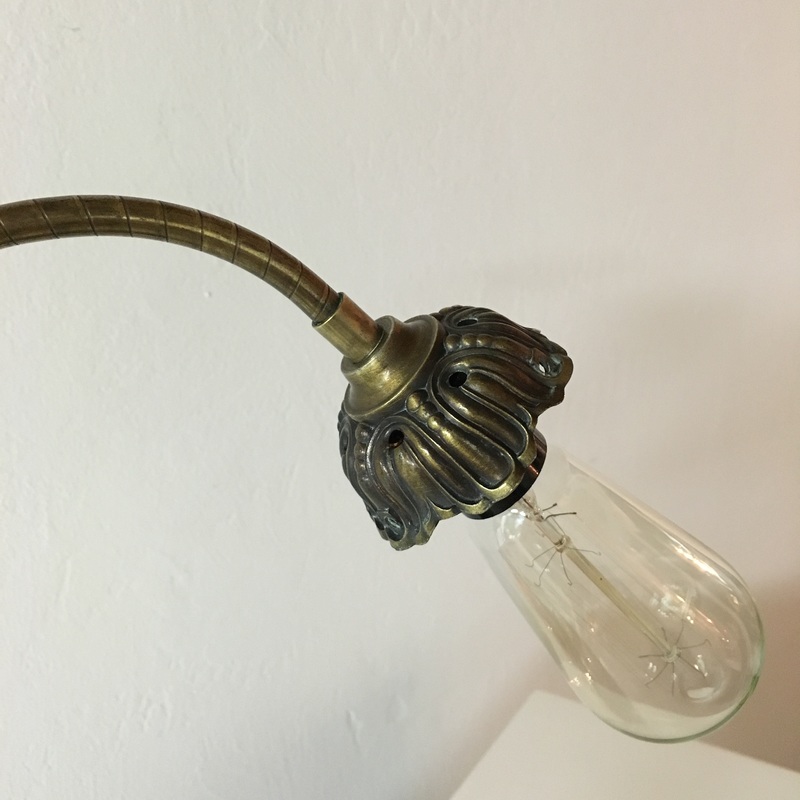
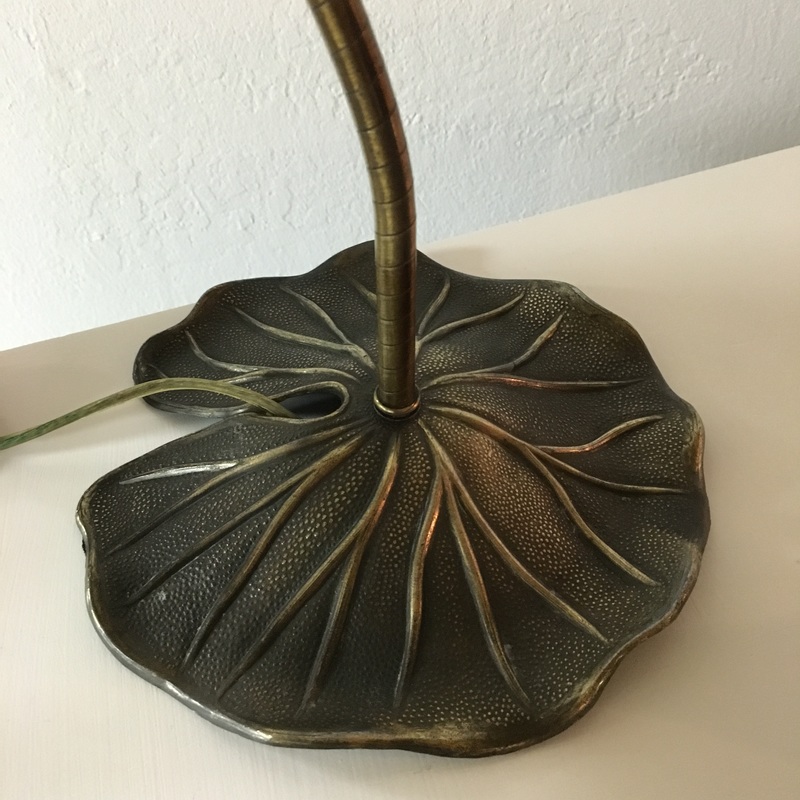
A few months ago while treasure hunting at the Alameda Antique Faire hidden behind piles of items I saw a lily pad base popping out and was instantly in love. I have seen this type of lamp before but never with an ornate shade base. They were beautiful and they needed to come home with me! Once home I did some thinking and decided that though they are lovely in their original form I wanted to update them. My first thought was Edison bulbs, industrial chic and modern. To do so the lamps needed to be rewired from a chandelier base to a standard socket. This is something I have never attempted before so I took them to a lamp expert only to be told it would cost $110...Eek! Not willing to drop that much cash on a couple of lamps I decided to give it a whirl myself...after all I changed all the electrical sockets and hardwired the ceiling pendants at the shop why was this any different. After digging through the lamp kit section at my neighborhood hardware store I found what I thought might do the trick! 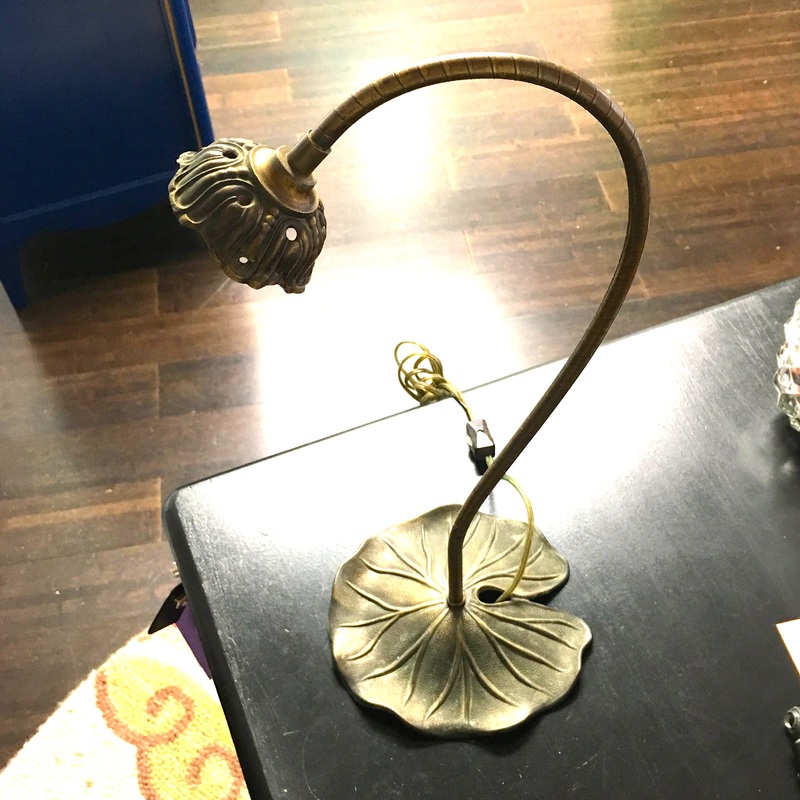 1 of 2 Vintage Lily Pad Table Lamps 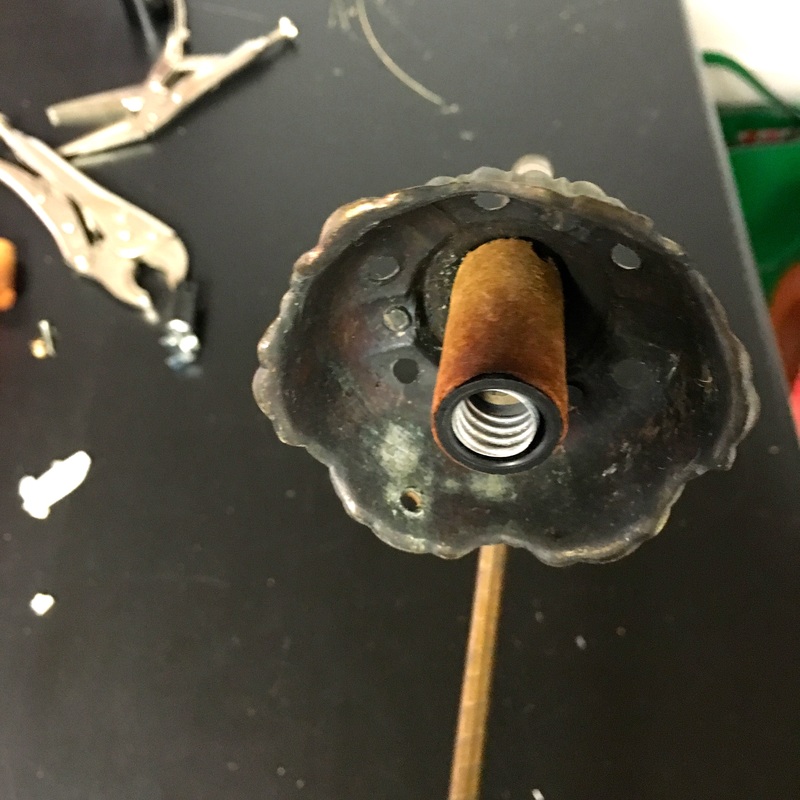 Chandelier base to be replaced with standard socket 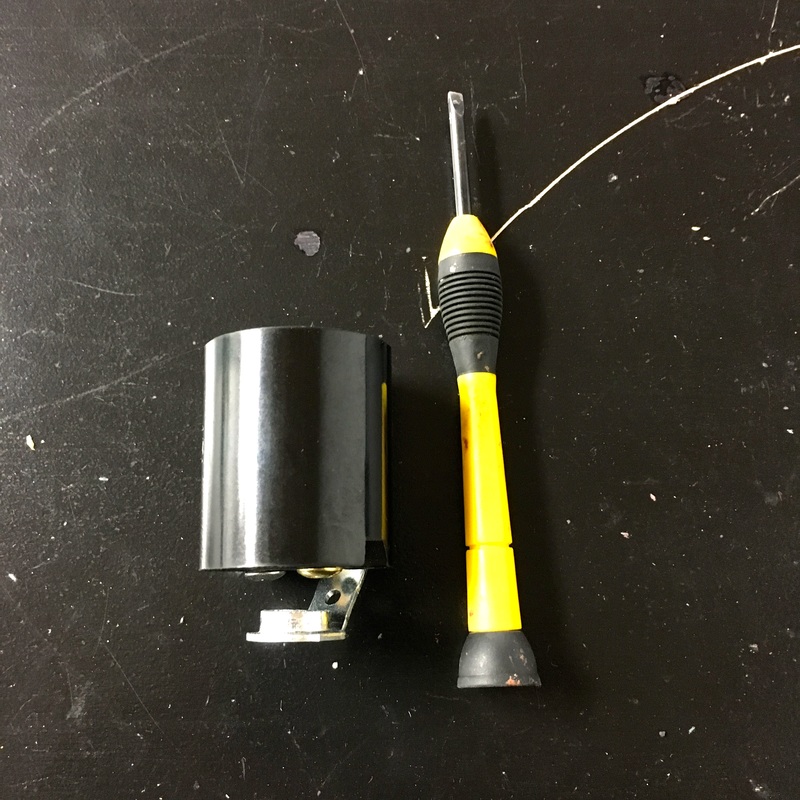 Tools needed to complete transformation 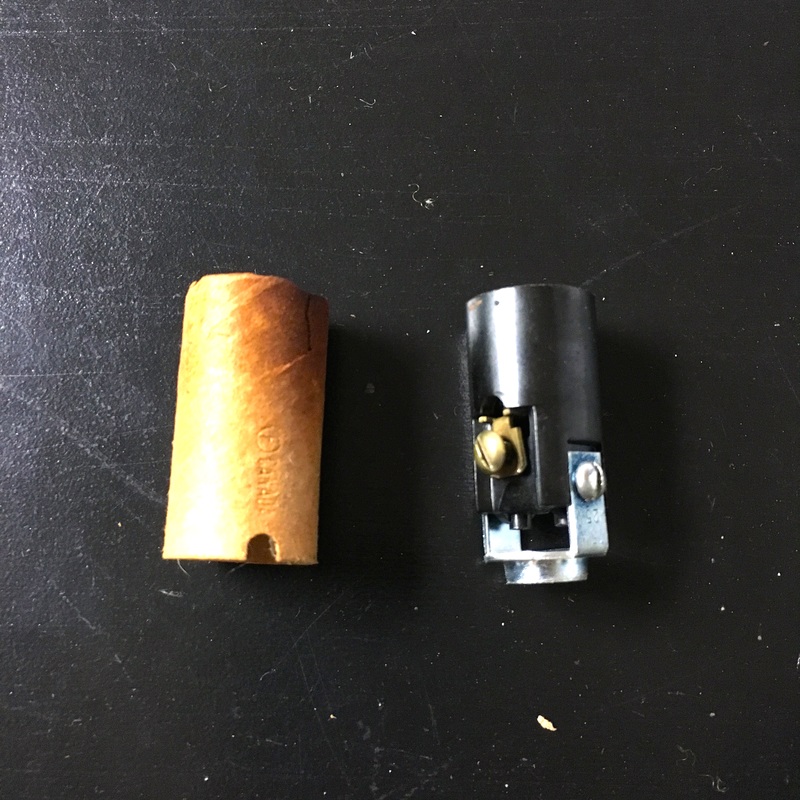 Chandelier base First thing make sure your wiring works, if it does not you will need to use new wiring. Secondly make sure the lamp is unplugged and gather your tools. In this case my wiring was good all I needed was a small flat head screw driver and the new socket. While removing the chandelier socket I made sure to mark which wire went with which screw, as you can see in the photo below one is silver and one is gold. I used a purple sharpie and just scribbled on the wire to be connected to the silver screw. Slide your wires through the hole that attaches the socket to the lamp, bend the wires around the proper screw and tighten. Screw the socket back onto the lamp, add a lightbulb and hit the switch! It really is that easy! 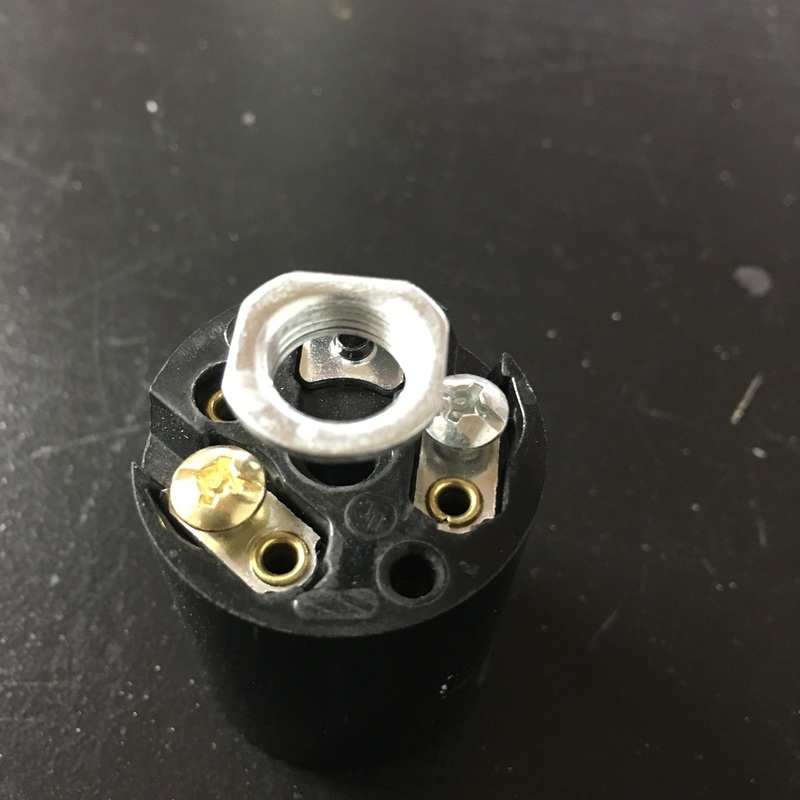 New Standard Socket
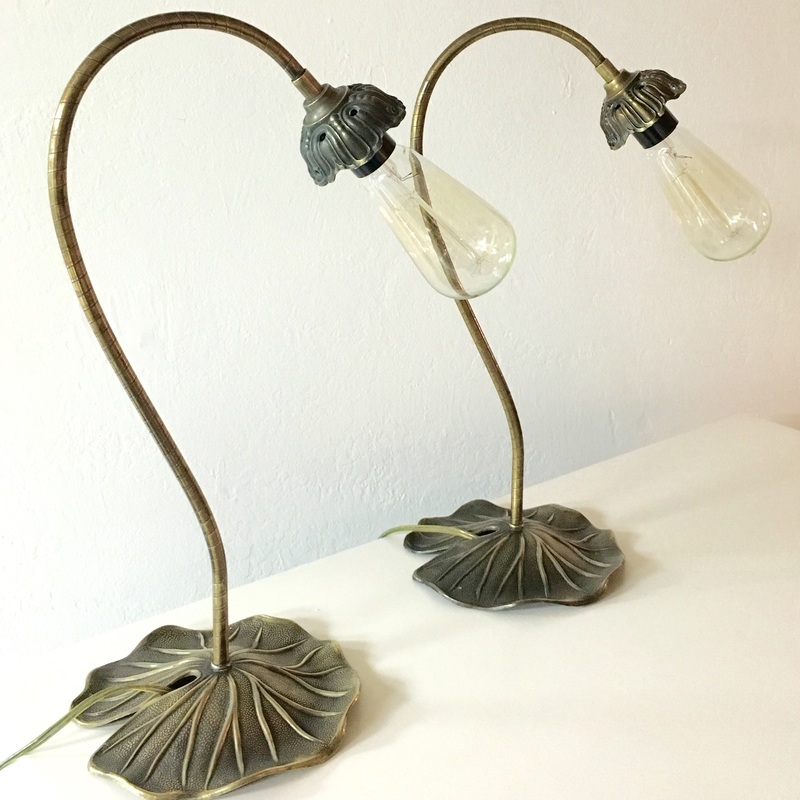 Final Product The lamp expert I spoke to said it was hard work and time consuming hence the hefty price tag. This took me 15 minutes and $9 to complete both lamps. I was a little weary after hearing how hard this could be and I didn't want to ruin such beautiful pieces, but when I plugged the lamps in and the light bulb lit up I was elated. I called Dad to tell him my story so proud of myself for accomplishing something new, but what really made me smile was what he said about the lamp expert, "He hasn't met a Stoecker"! Dad was right, as usual, you can do anything you put your mind to, have confidence in yourself and give it a whirl. Thanks Dad!
1 Comment
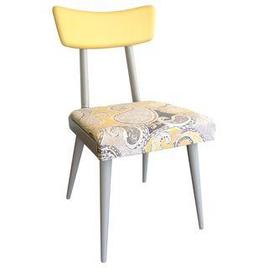
I have stocked the shop for the kick-off of the holiday shopping season! Give the gift that no one else will, all home decor accessories and furniture are one of a kind! Here are a few of my favorites! Shop the Small Business Saturday Sale! 10% Off Home Decor & 20% Off Furniture through Monday November 30th.
HOLIDAY HOURS: Wednesday-Sunday 10am - 7pm
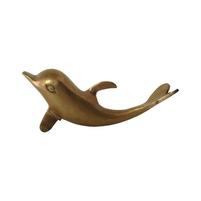
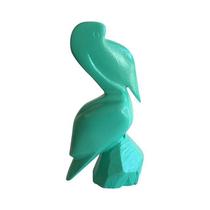
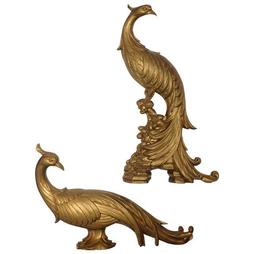
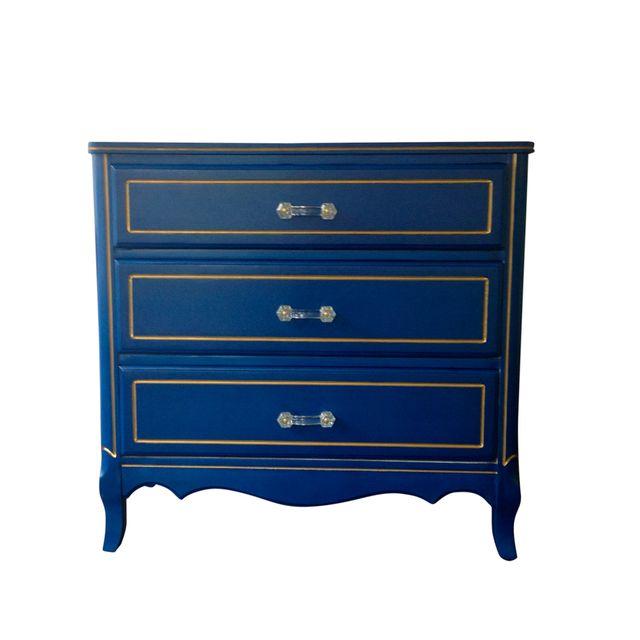
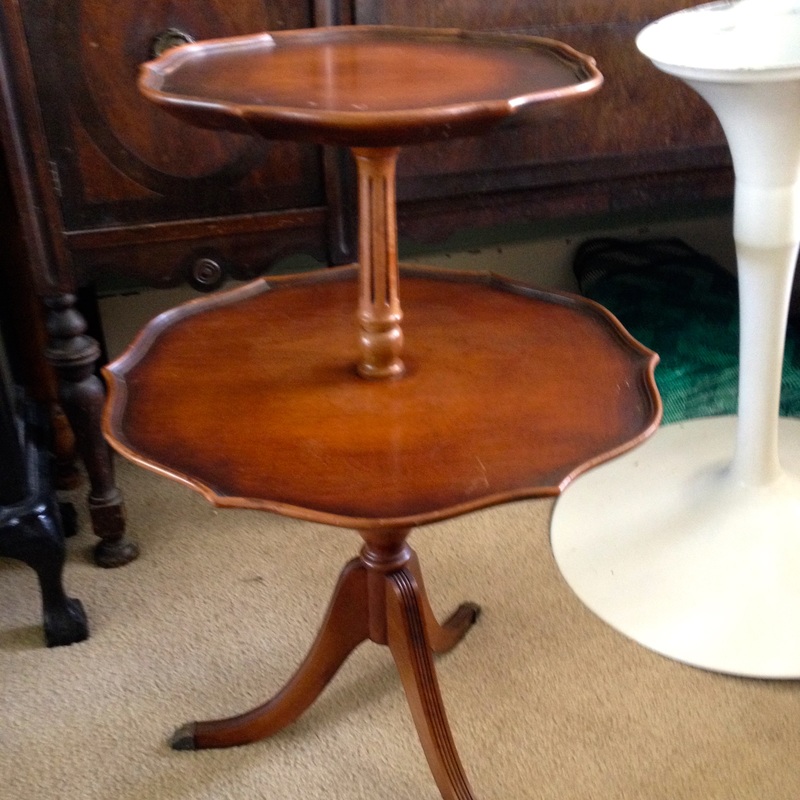
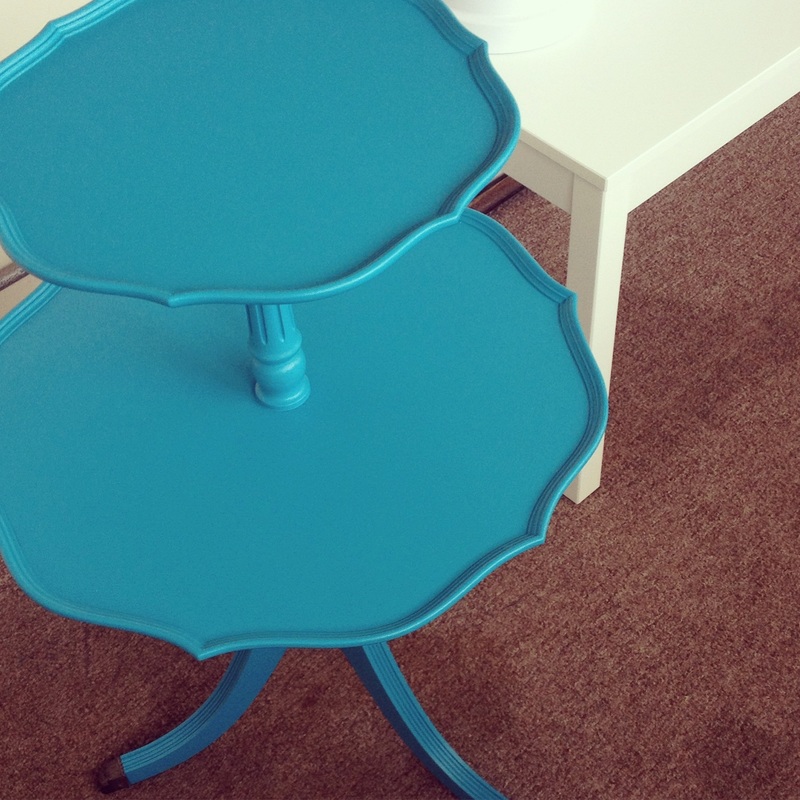
I am very excited to share some news with everyone today! Next month I will be a participating vendor at the Alameda Point Antique Faire! On Sunday October 4th the shop on Irving Street will be closed but you will be able to find Delightful Designs goodies at Alameda Booth D28. For more information including directions pop over to their website www.alamedapointantiquesfaire.com I have been attending this faire since I moved to the San Francisco area seven years ago! Whether you are looking for something particular or just want a fun way to spend a Sunday this is a great place to do either! As you enter the gates the familiar scent of kettle corn hits your nose... grab a bag and begin to wander the endless rows of treasures. Bring the family there are plenty of toys for little ones to take home! Don't forget to stop for lunch at one of the many food trucks! Here are some Before & After photos of Items I have found at the Alameda Faire!
If you are a resident of San Francisco you will welcome the change as you escape from Karl the Fog for a sunny adventure...take the ferry if you really want to up the adventure!
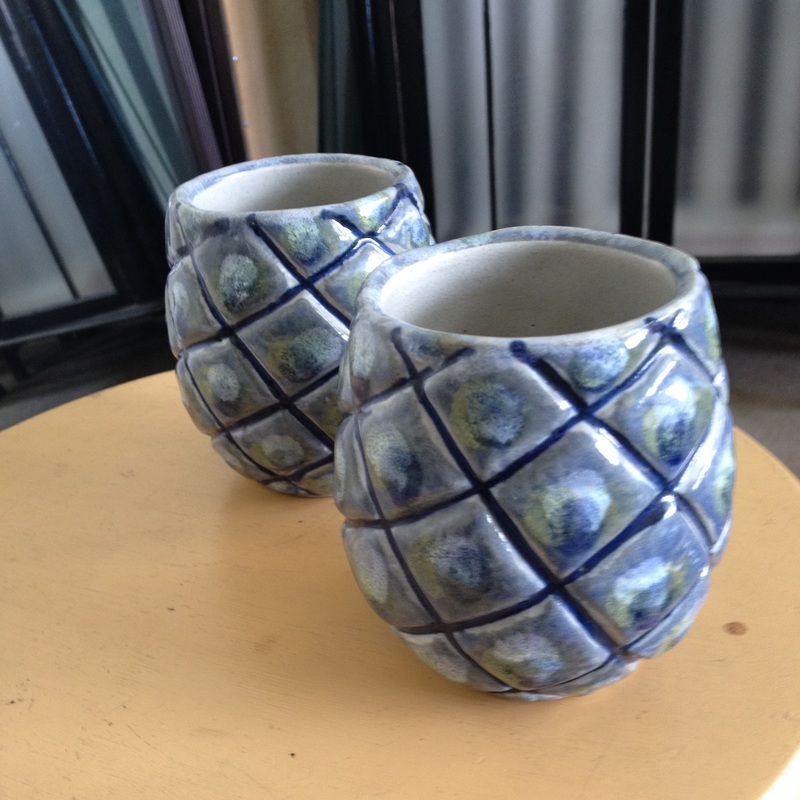
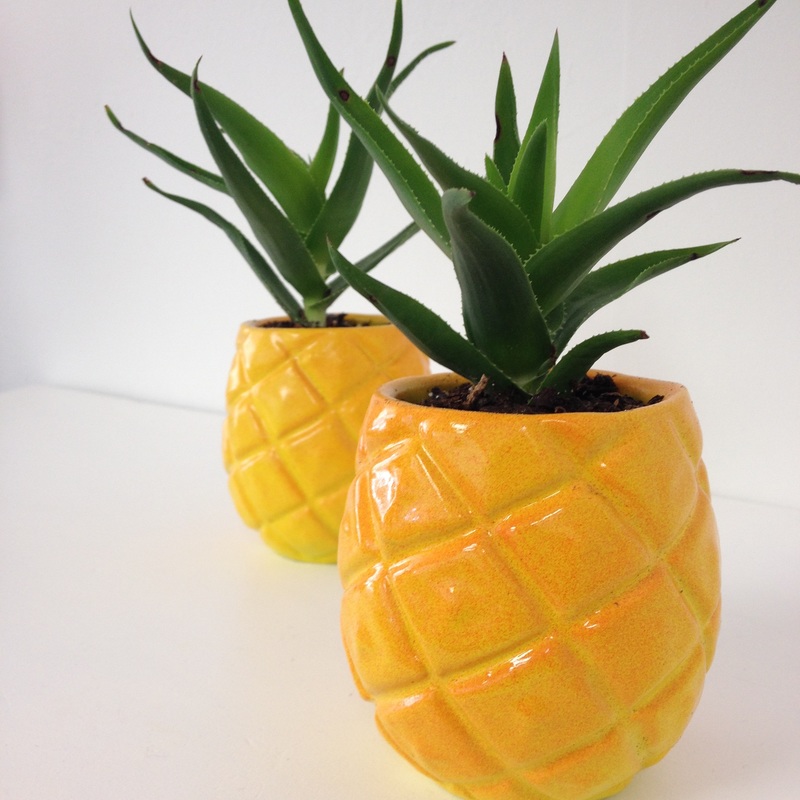
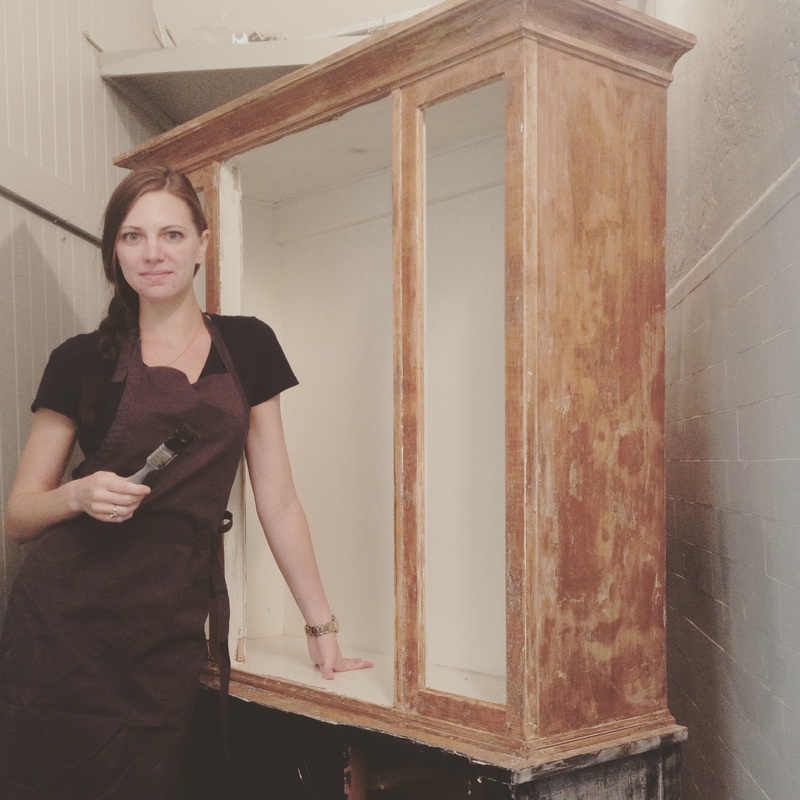
Chairs! If you know me personally you know I have a slight obsession... you can never have too many! Chairs are a fun and my personal favorite way to add personality and color to any room. This week I received a rush order for four wood dining chairs to be updated with a matte grey finish, not my usual color of choice but a fun project all the same! The set of Windsor style chairs I used was a mix that I rescued from different places around San Francisco. A light sanding, two coats of Benjamin Moore Iron Mountain matte grey, a coat of satin Minwax polycrylic and these chairs where ready to be on their way to the Hampton's! Safe travels! 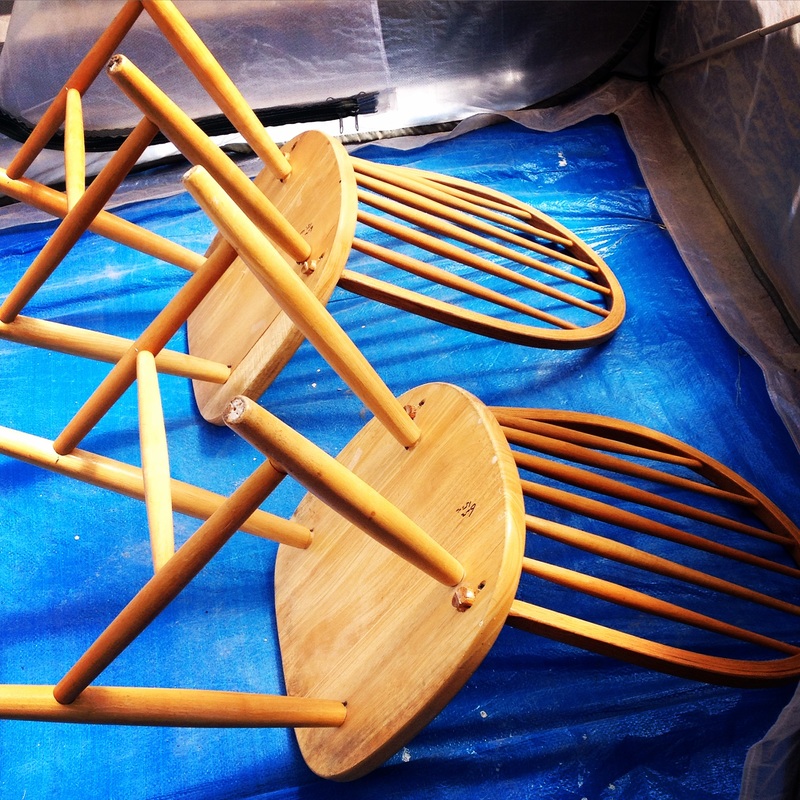 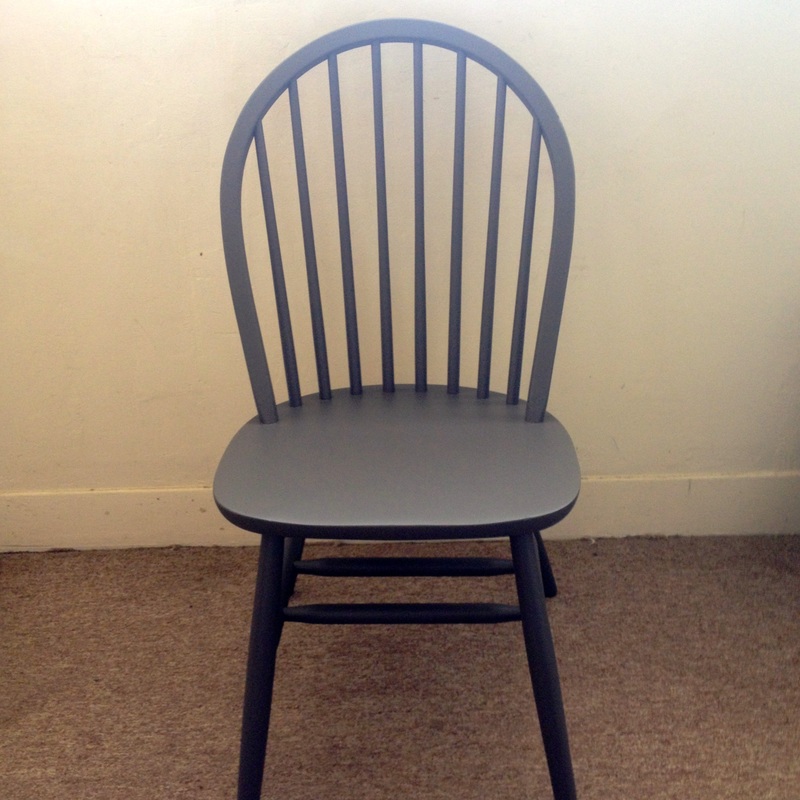 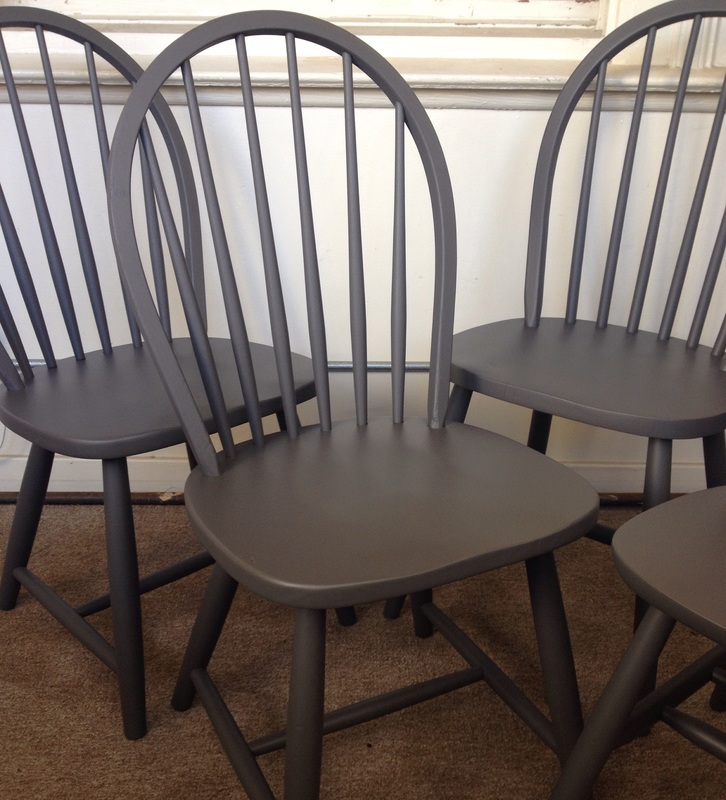 As this set of dining chairs were being picked up to make the trek across the country I welcomed another set of four to transform! Here is the "Before" stay tuned for the "After"! 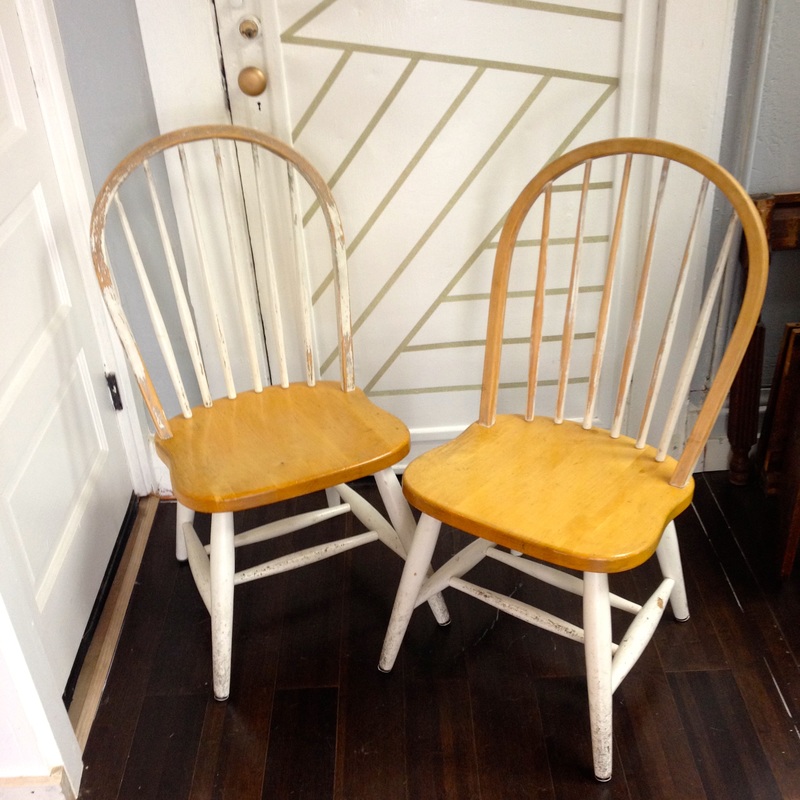 This past week has been a busy and productive one. I have been staying up late and getting up early to paint and get some more products ready to bring into the shop. Here is a look at some of the works in progress and some items I have finished this week. This nightstand is going through quite the transformation, I have removed the lower cabinet door, given it a coat of primer and will be adding a pop of color this evening! (Stay tuned for the final product) 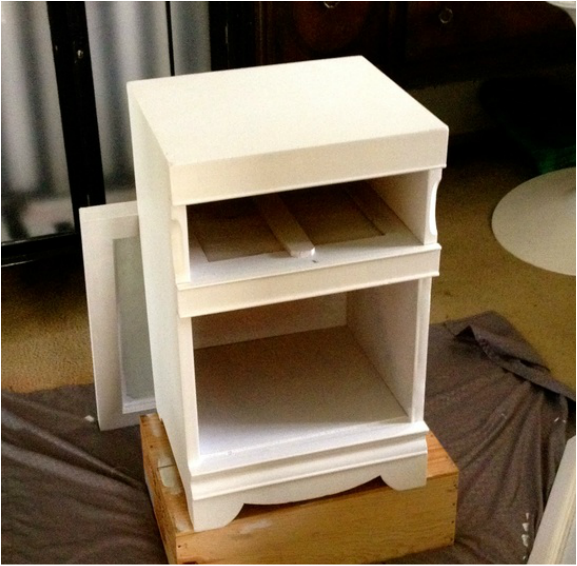 Spoiler Alert: These old window panes are being repurposed into a sandwich board for the shop! Right now they have been primed and will be given a fun color for the frames and a chalkboard to share info. 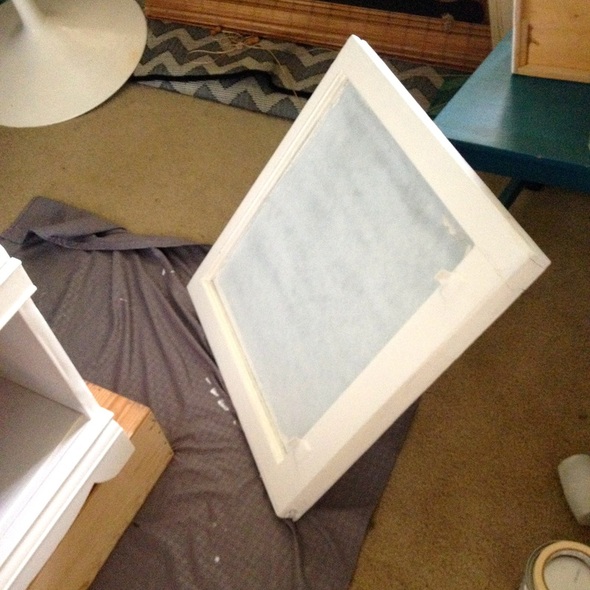 I have also completed a collection of colorfully chic vases! Stop by and take one home for your weekend flowers! Tomorrow the Inner Sunset Farmers Market will be right around the corner! 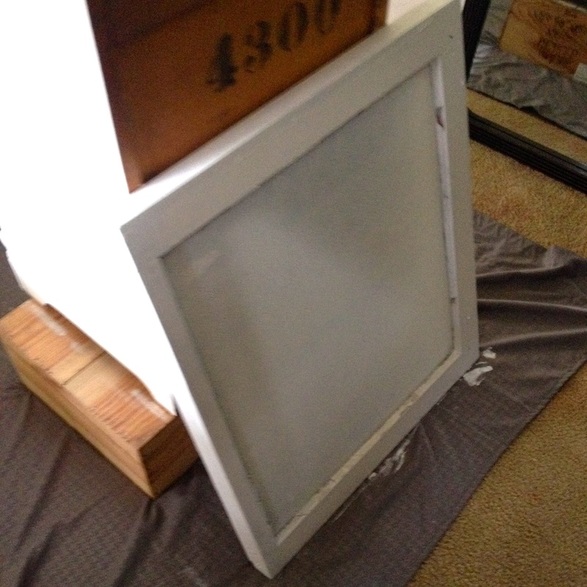 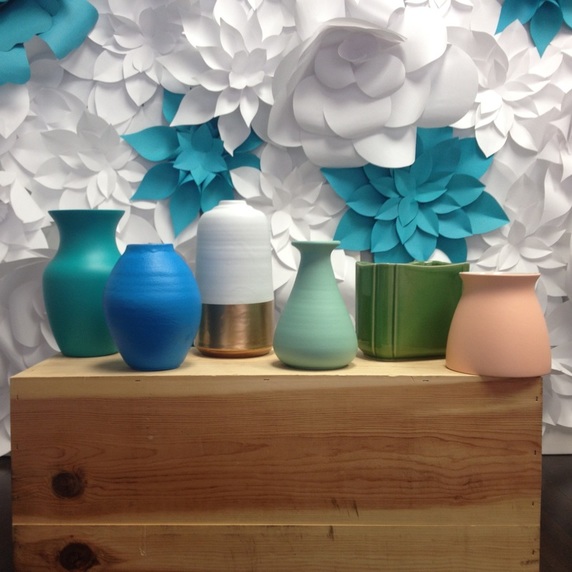 The new paint booth was built and used to paint these wonderful mid century metal candlesticks a fun modern copper! 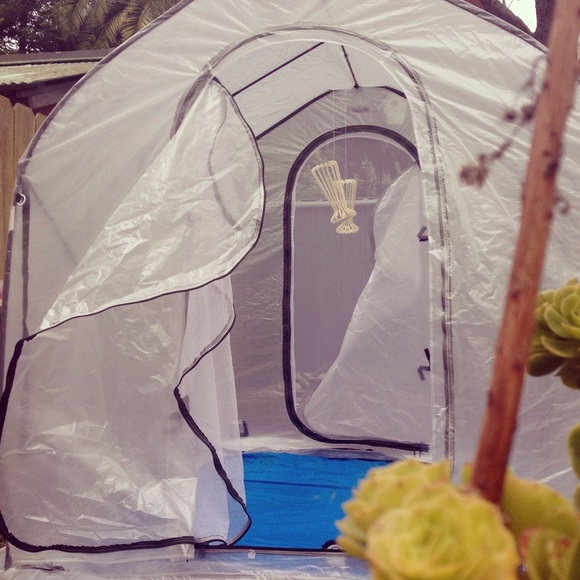 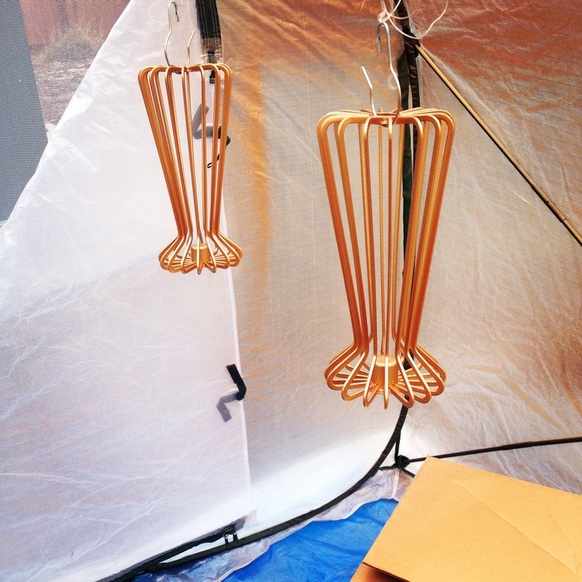 We also tackled this big hutch, a piece with great bones but a bad paint job. The hutch has been successfully stripped and will be getting the first coat of primer and paint this weekend! I'm really exited about this piece so I will be leaving the color a secret... I will post the final product and its before and after transformation once complete.
I hope everyone has a wonderful weekend! See you all next Saturday!
I rescued this large vase from a San Francisco thrift store (Apologies for not having a "Before" photo, I'm still working on being a better "Before and After" photographer). It was an awful shimmery brownish colored piece, but the shape was fun so I brought it home! I knew I wanted to do vertical stripes to play with the tall thin shape, as well as something that could be dressed up glam or playful. This was a pretty easy refresh project, a couple coats of paint and it was better than new! To add some whimsy I made a couple of large paper flowers. Having made paper flowers to cover the 8' x 11' wall in the shop I was able to pop these out fairly quickly. There are plenty of paper flower how-to's out there, my suggestion is to watch a few videos and then just start to play around with paper. I would recommend to start with simple printer paper as it is inexpensive and once you find a rhythm and style you like then upgrade to the pretty stuff. 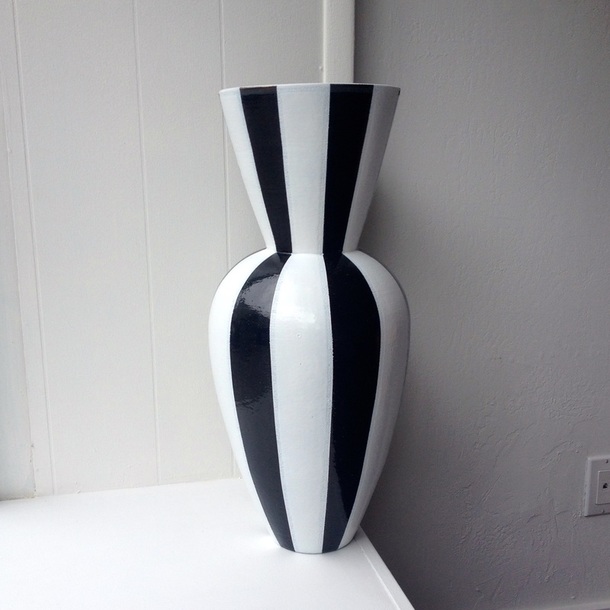 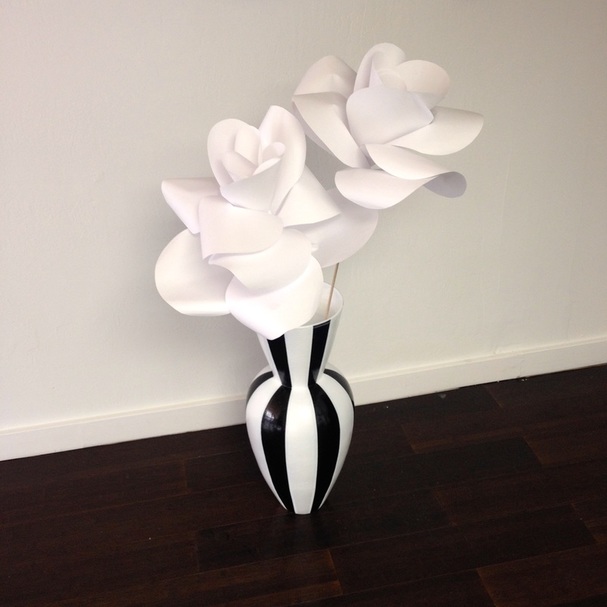 Vase measures 23" H x 10" W with an opening of 8.5" W I made a few different templates for the styles I liked but feel free to just grab scissors and start cutting shapes (for each shape I made 3 sizes). Fresh flowers are not perfect so don't worry about your paper versions being either. I am more of a perfectionist OCD type so I traced and cut each petal...after about 1/3 of my large wall was covered and the grand opening was approaching the templates became less important. :-) For the the flowers in the vase I bought a couple of wood dowels from the hardware store and took the white plastic tape I had on hand. Curl the petal edges, just a simple roll with your hands works great, wrap around the dowel and secure with the tape. Continue to layer the petals until you have the size you like. 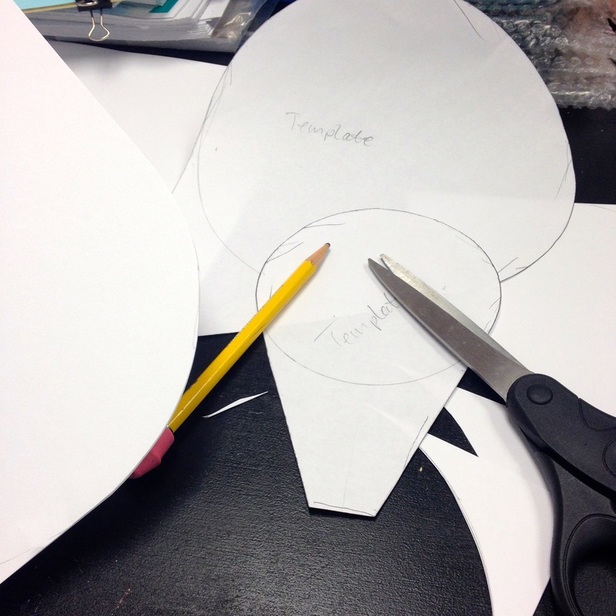 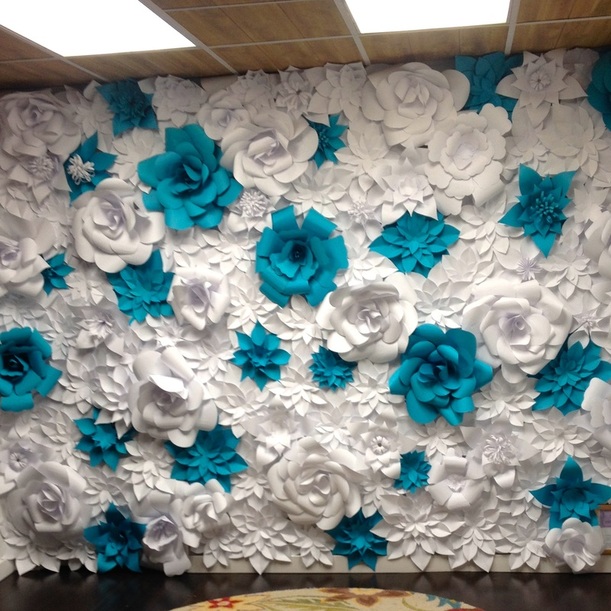 I'll leave y'all with a photo of the large wall. Stop by and see it in person!
San Francisco is known to be cool, foggy and grey and as I was born and raised in the sunshine state, San Francisco's weather can be a little tough to bear. Especially when 75 degrees is what Florida winters usually feel like. In true southern manner I keep the front door open most days to physically say, "Hello! Welcome"! Unfortunately there are some days that are a little too chilly for my blood and I have to close the door. Sadly I feel like this suggests that I am not open. In an attempt to make the front door more welcoming I pulled out some bright paints and had an arts & crafts day!  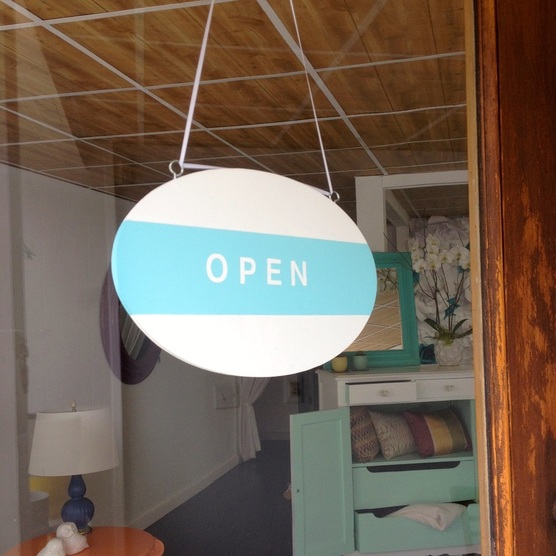 I picked up some supplies and sat down for an afternoon of fun. First I gave the wood oval a couple of coats of white paint, front and back. I then measured and taped off a 3 inch section for the aqua stripe. Next I used basic 1 inch sticker letters, spaced them out and made them as straight as possible, and painted over them with about 3 coats of aqua. I let the paint dry and pulled off the tape and stickers to reveal the white paint below. A few touch ups where the paint snuck under the tape and my new sign was done. I added 2 screw loops and some ribbon and it was ready for the front door! I hope now if you should wander by and the front door is closed this fun sign will say, "Hello, We're Open" and you will feel welcome to walk in! 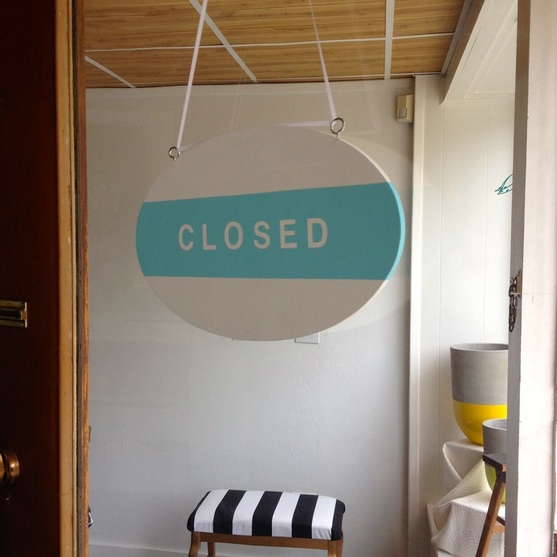 |
~ ABOUT ME ~
Creative Owner of Delightful Designs, a boutique where furniture is given a new colorfully chic life! Read more...
CATEGORIES
All
ARCHIVES
November 2017
|


 RSS Feed